Solar Herb Dryer (Dehydrator) DIY
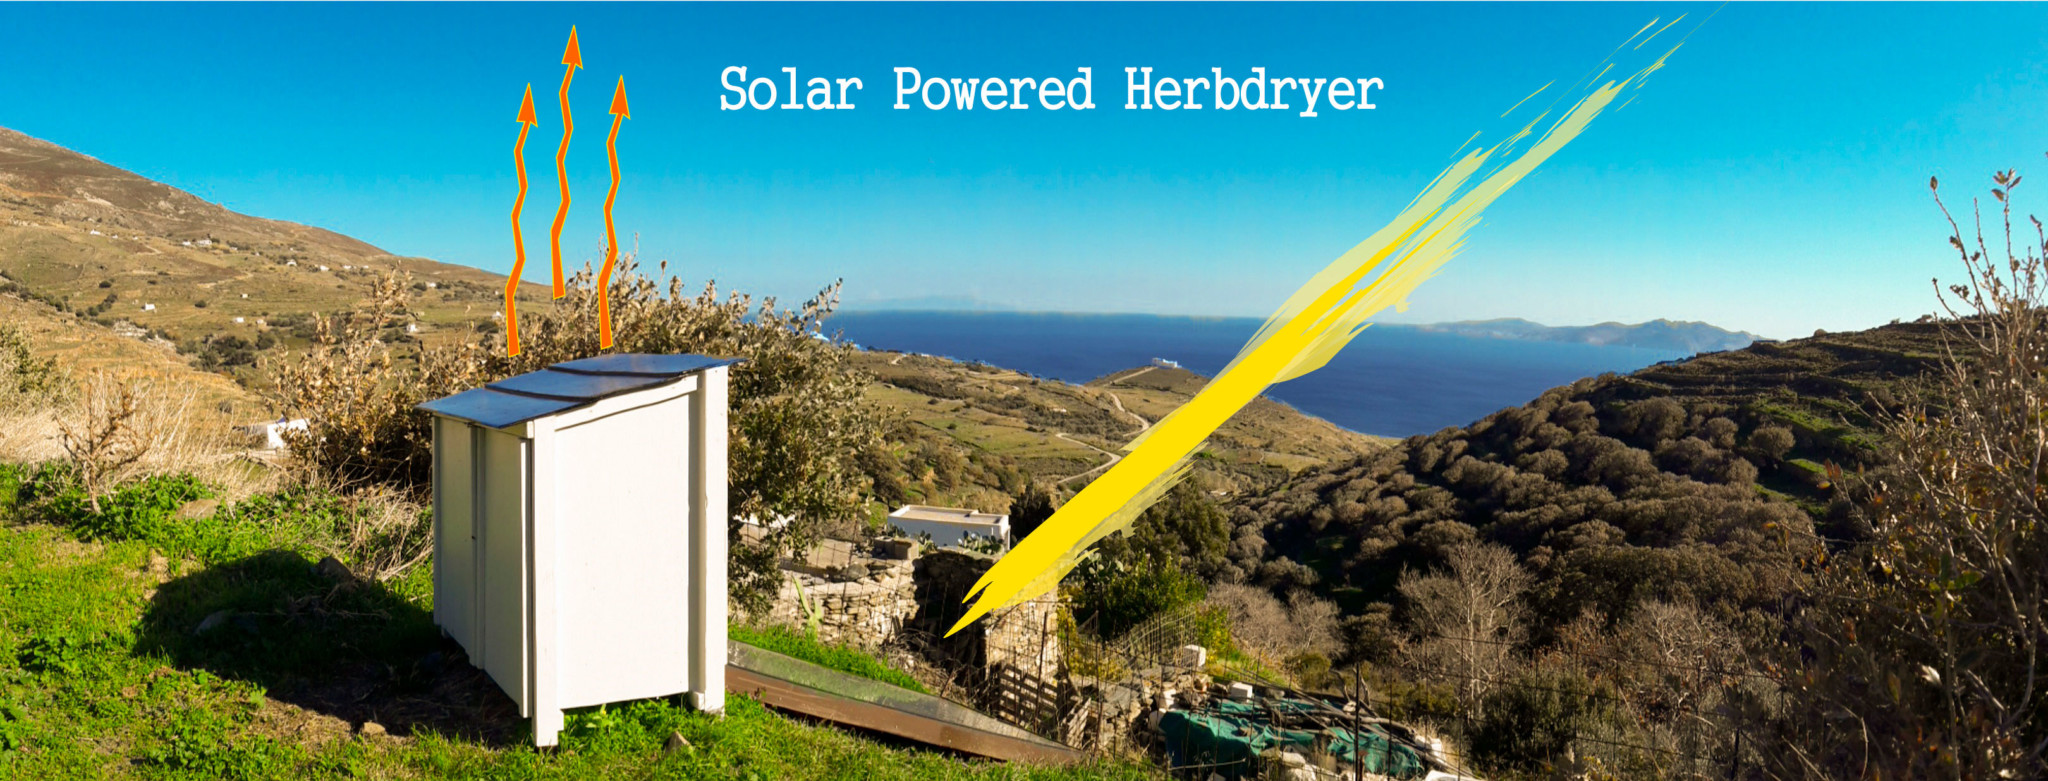
As the garden and the different herbs we planted are becoming bigger we felt the need of having a solar dryer to dehydrate and preserve more and more food. Here on Tinos island we have a lot of sun radiation and a generally warm climate which should give us optimal conditions for working with the solar dryer. The passive design fits nicely into our sustainability approach and goes hand in hand with permaculture practice.
The design of the dehydrator is greatly inspired by the work of Dennis Scanlin from the Appalachian State University. While I was looking at the design it came to my mind that it would be great to use an old Solar heater panel as a heat trap. We discovered that it is fairly easy to find panels from old solar water heaters at recycling places or at you’re local plumper. They have everything you need inside: good insulation at the back, very good solar glass for optimal absorption of radiation and a really good copper heat absorber. So we changed the design a bit in order to fit everything to our panel. We increased the actual drying box a bit and switched to side opening doors. The benefit in this design lays in the recycling aspect and the lower amount of building effort.
The initial design was made in order to build it at one of our permaculture seminars but we didn’t have the time this year. So we decided to build it now.
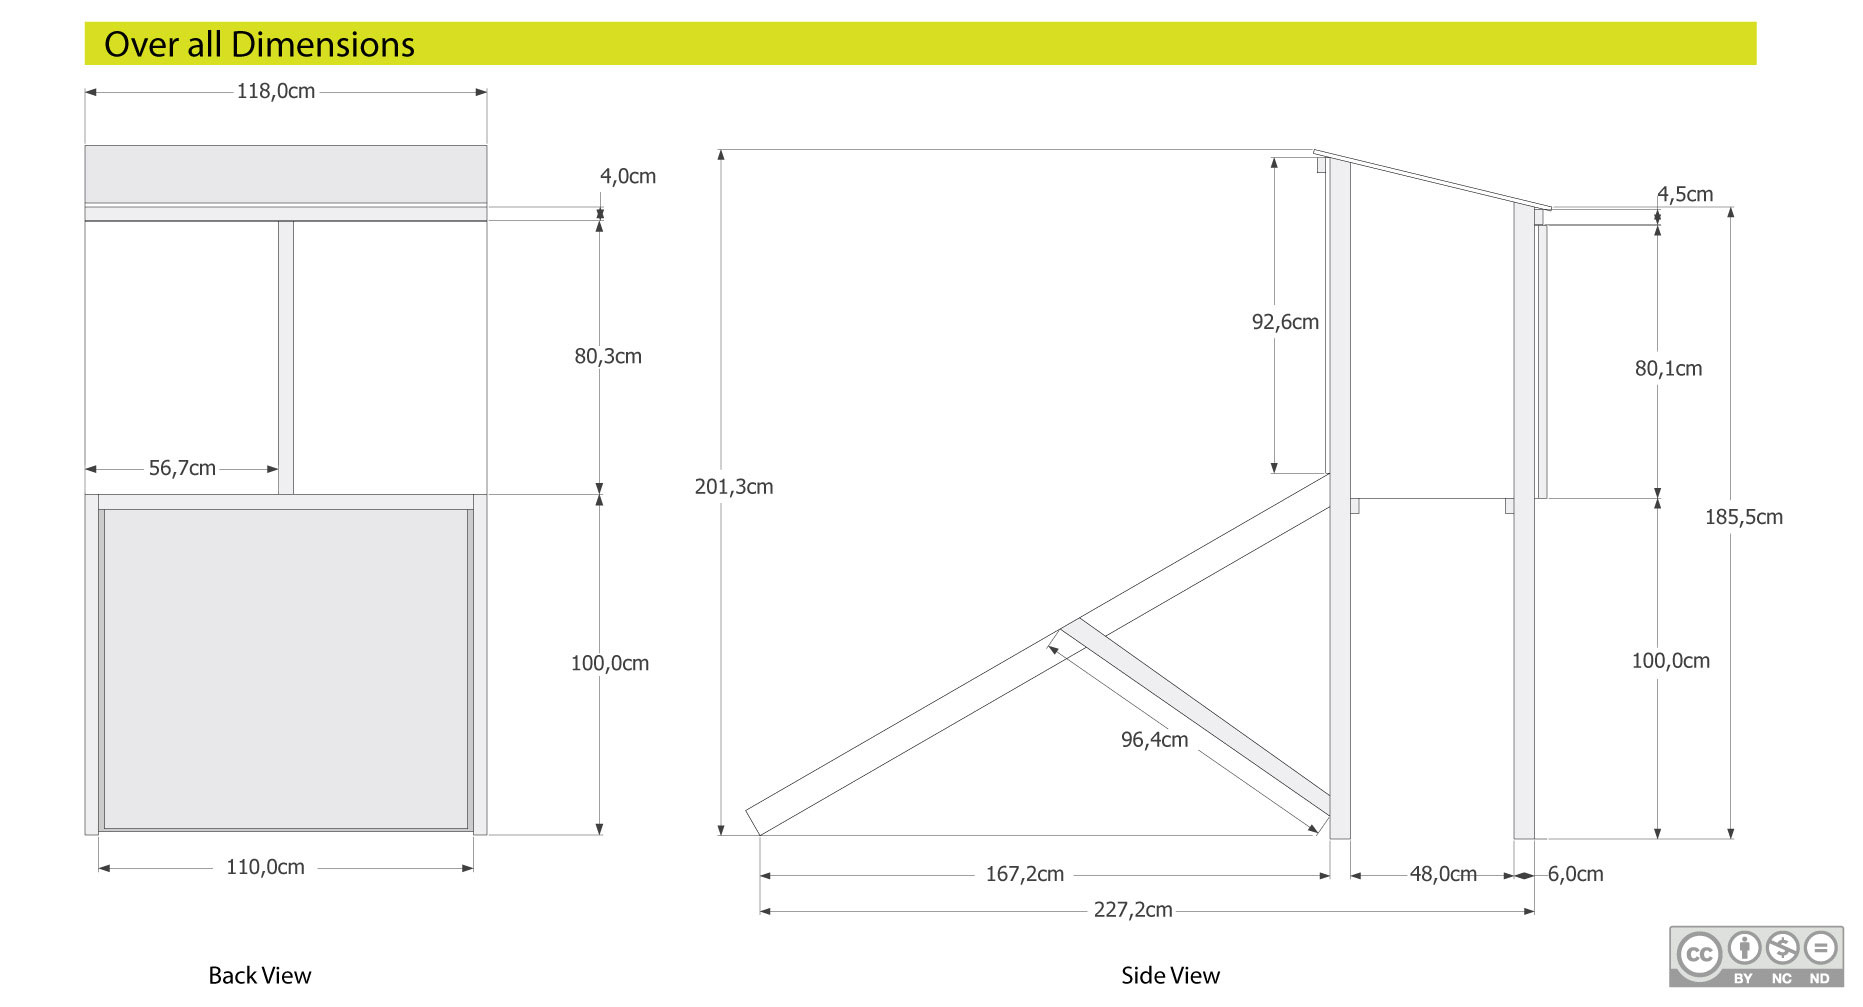
The over all Dimensions
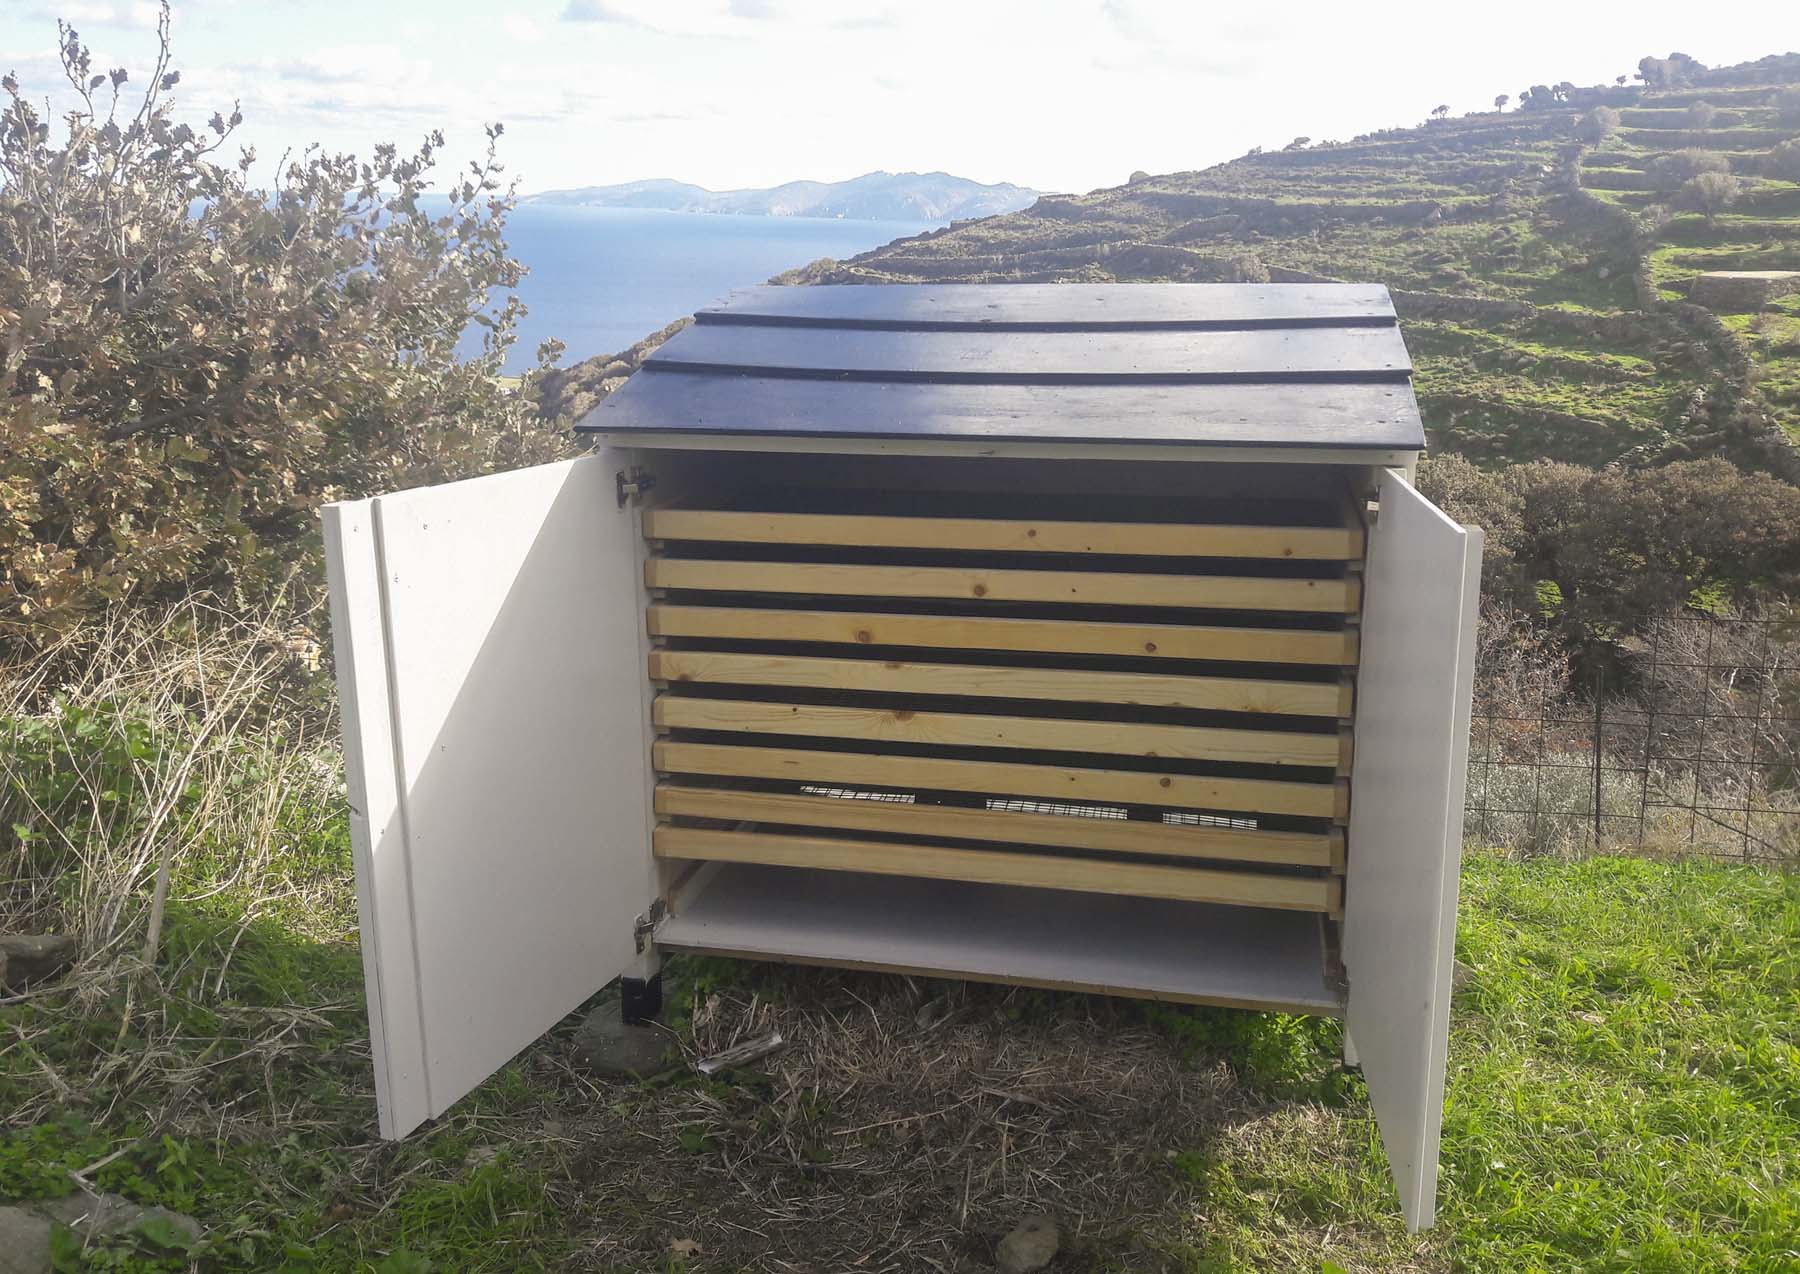
In our case the dimensions are bond to the heater panel we found. The panel is fairly big with 110 x 198 cm, which gives us a 2,2 sqm heat absorber surface. The actual drying box has a volume of 0,65 cubic meters. The angel at which the Panel stands is around 40 degree. Of course that can be changed if you change the Height of the Box. If you want to operate it mainly in summer, then choose a lower angel, if you want to optimise it for spring and autumn, choose a higher angel.
Basic Materials and Tools
The Timber we used is standard rough construction softwood in order to get the price as low as possible. We sanded them down on site in order to give them a smooth touch and make the paint job easier. The beams are 2,5×4,5 and 4×6 which are standard sizes here in Greece. We used one sheet of outdoor plywood with 12mm thickness. The material for the frame can be any kind of mesh from plastic or metal like mosquito net, chicken wire. The important part is that the mesh is big enough in order for the warm air to circulate properly but small enough to hold the material you want to dry. If you want to take it to the next level get some material that has a food grade certificate just to make sure you dont and up contaminating your food with anything nasty leaking out of the material. You should have some basic wood working tools like sketched out below.

Explosion Drawing
The explosion drawing gives you an basic overview of the pieces that are needed and the place where they will be placed. Also you see how they interact with each other. In the next picture where we show the parts with the dimensions and the amount you can read out where they are used.


Assembly
In first cut all the wooden pieces that are described and sand them down. Then start with disassembling the solar panel. I think every panel will be a little bit different from the inside. Ours was actually consisting out of three parts, the metal sheet back plate, the insulation at the back, the heat absorber, the solar glass and the aluminum frame holding everything together. So we got rid of the insulation in order to free space in side the frame so that the warm air has room to flow upwards. Then we took out the absorber and cleaned it. Afterwards we cut the openings in the upper and lower part of the frame for the air inlet and outlet. Then we cut an extra piece of plywood in order to replace the old metal back plate. This is important to improve the overall insulation of the heater. The old metal back plate was then screwed to the new plywood back from the inside and on top we placed the copper heat absorber. Then we fitted everything back into the aluminum frame.


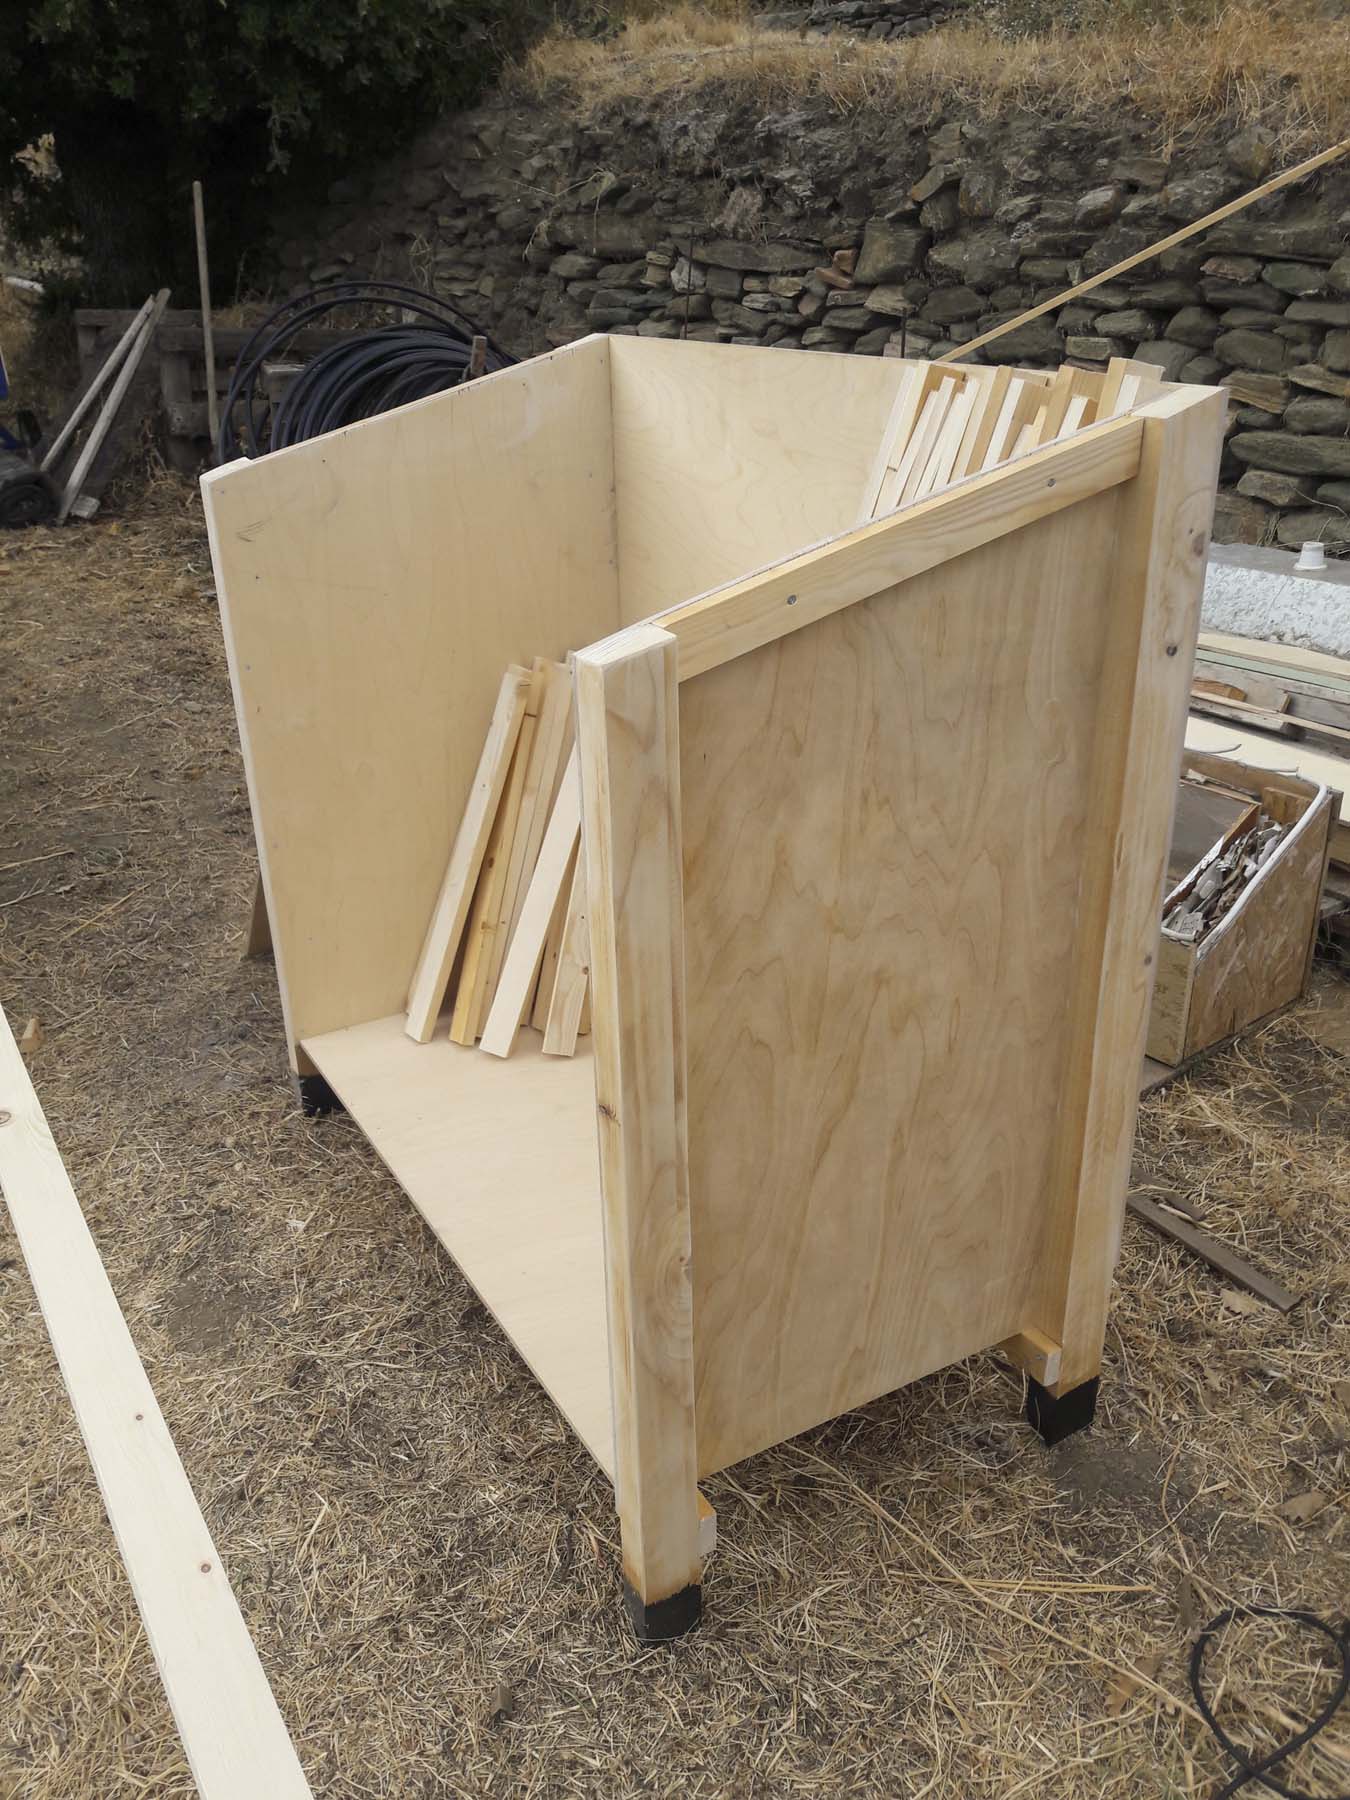
Then start with the assembly of the wooden box that sits on top of the heater panel. Screw the beams to the plywood I like to add some wood glue to the connection in order to have a good long term adhesion between the parts. Connect the 2 side parts with the front panel and put in the floor plate. At this stage we changed the design adhoc. We realized the we actually don’t need the legs under the box which make the whole construction fairly big and bulky. We came up with the idea to place the panel on a piece of sloped land and the box on top on the ground. You will see what I mean on the next pictures. So we cut the legs off. Then we started the frame construction that is quite a hassle because you have to do the same steps over and over again. In order to simplify this process we made a place holder construction so that it is easy to align the pieces in a 90 degree angel.


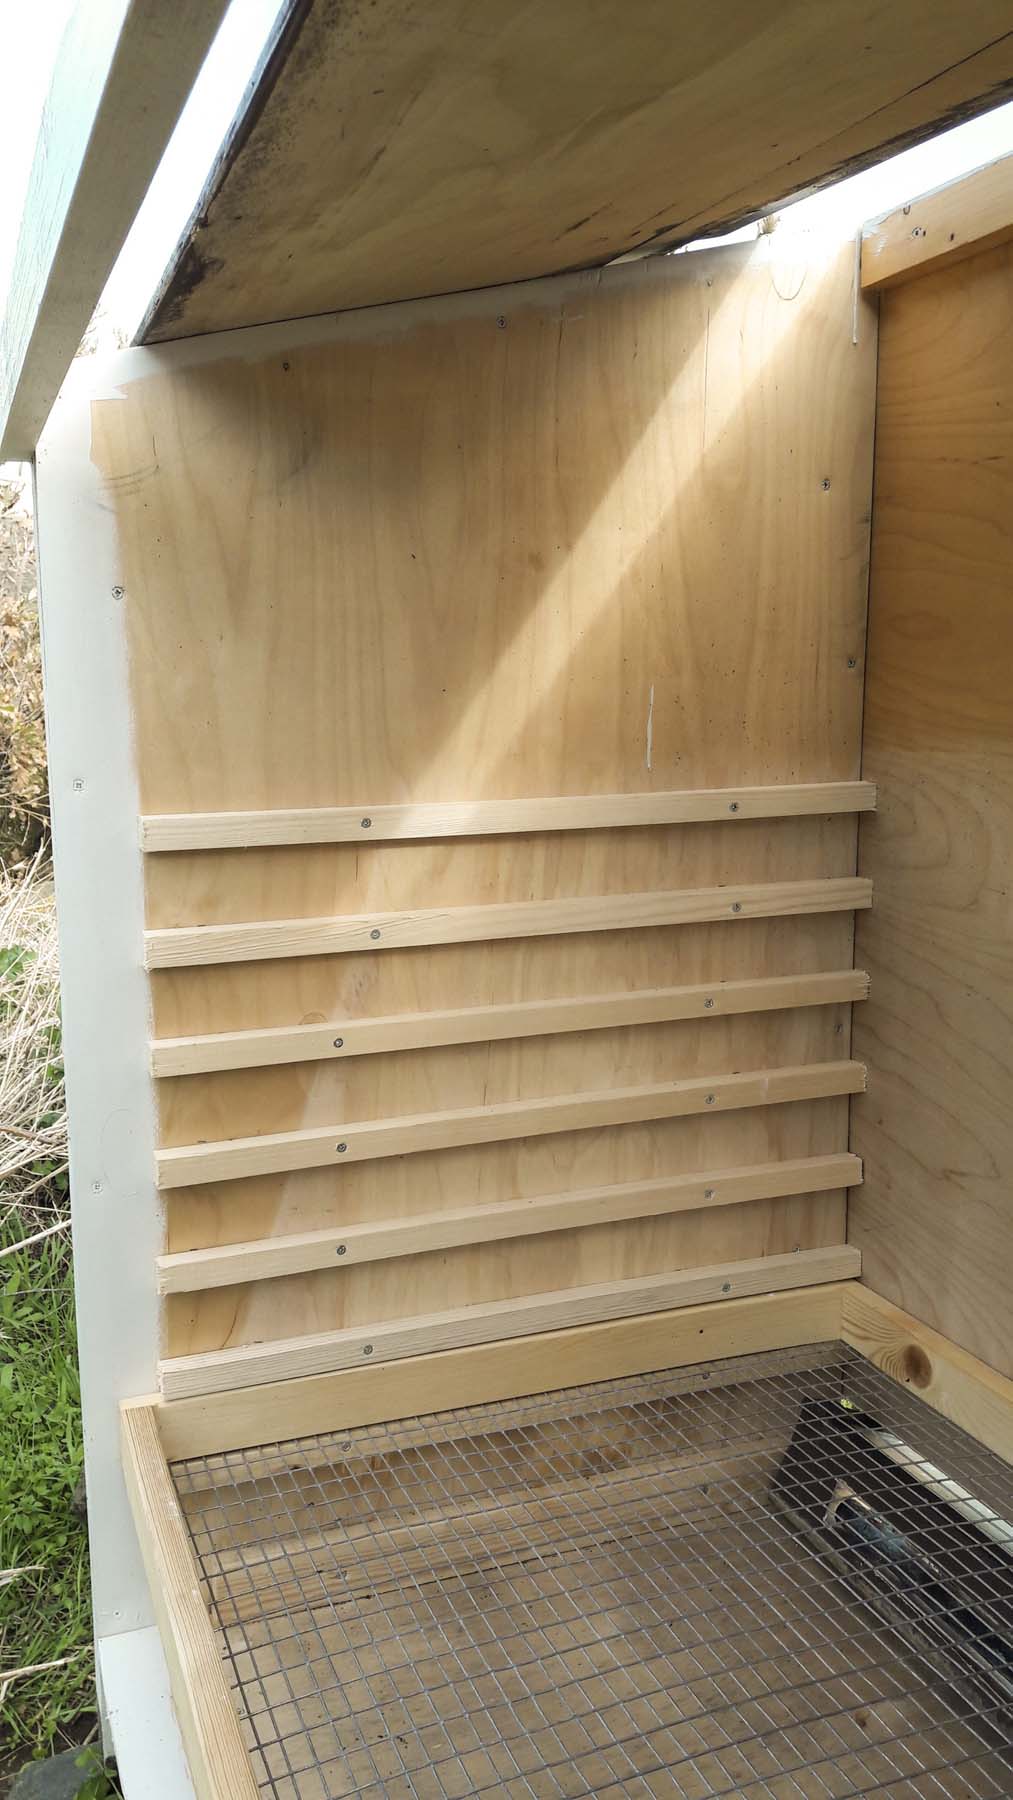
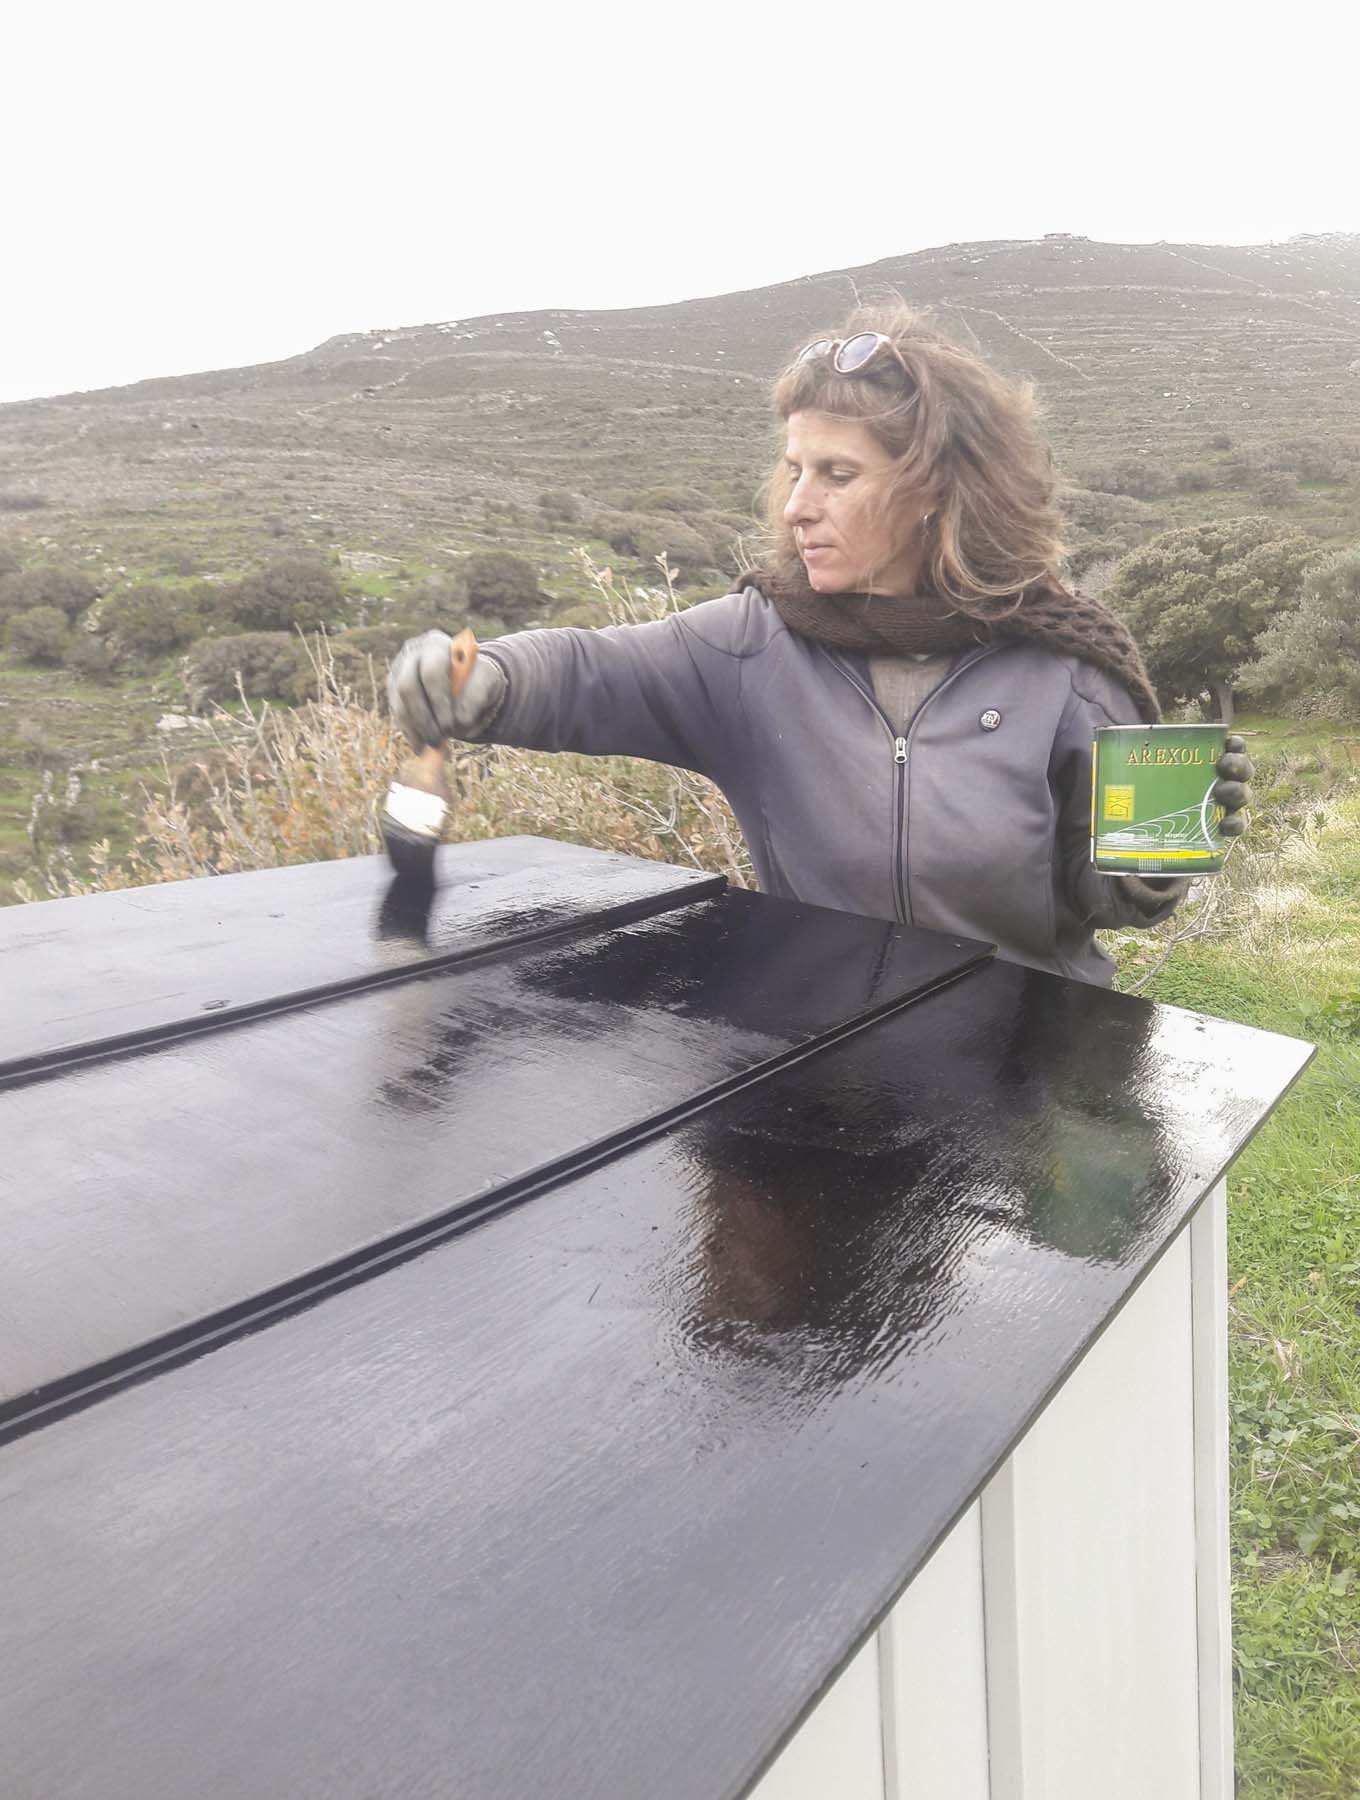
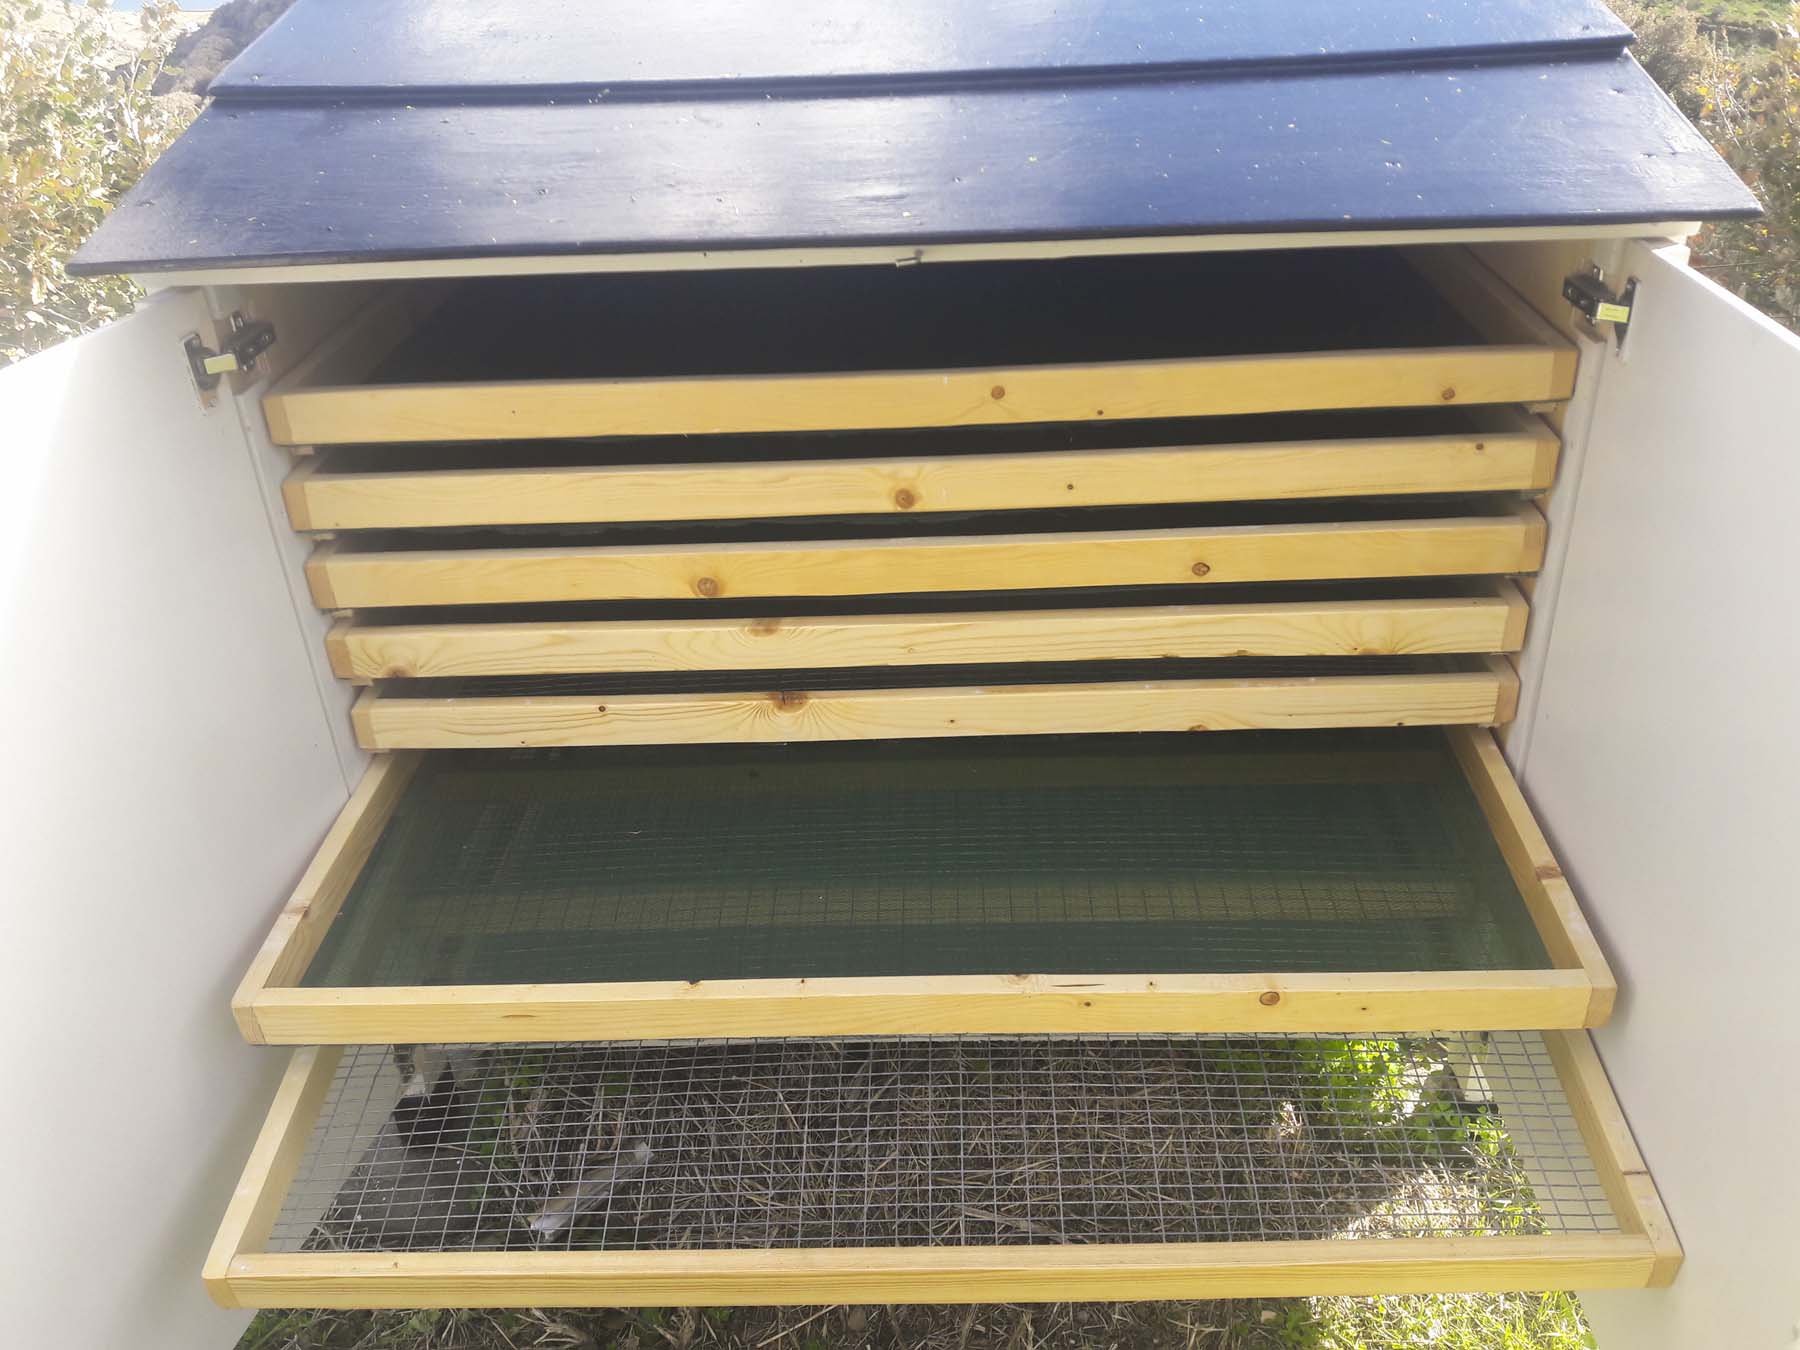
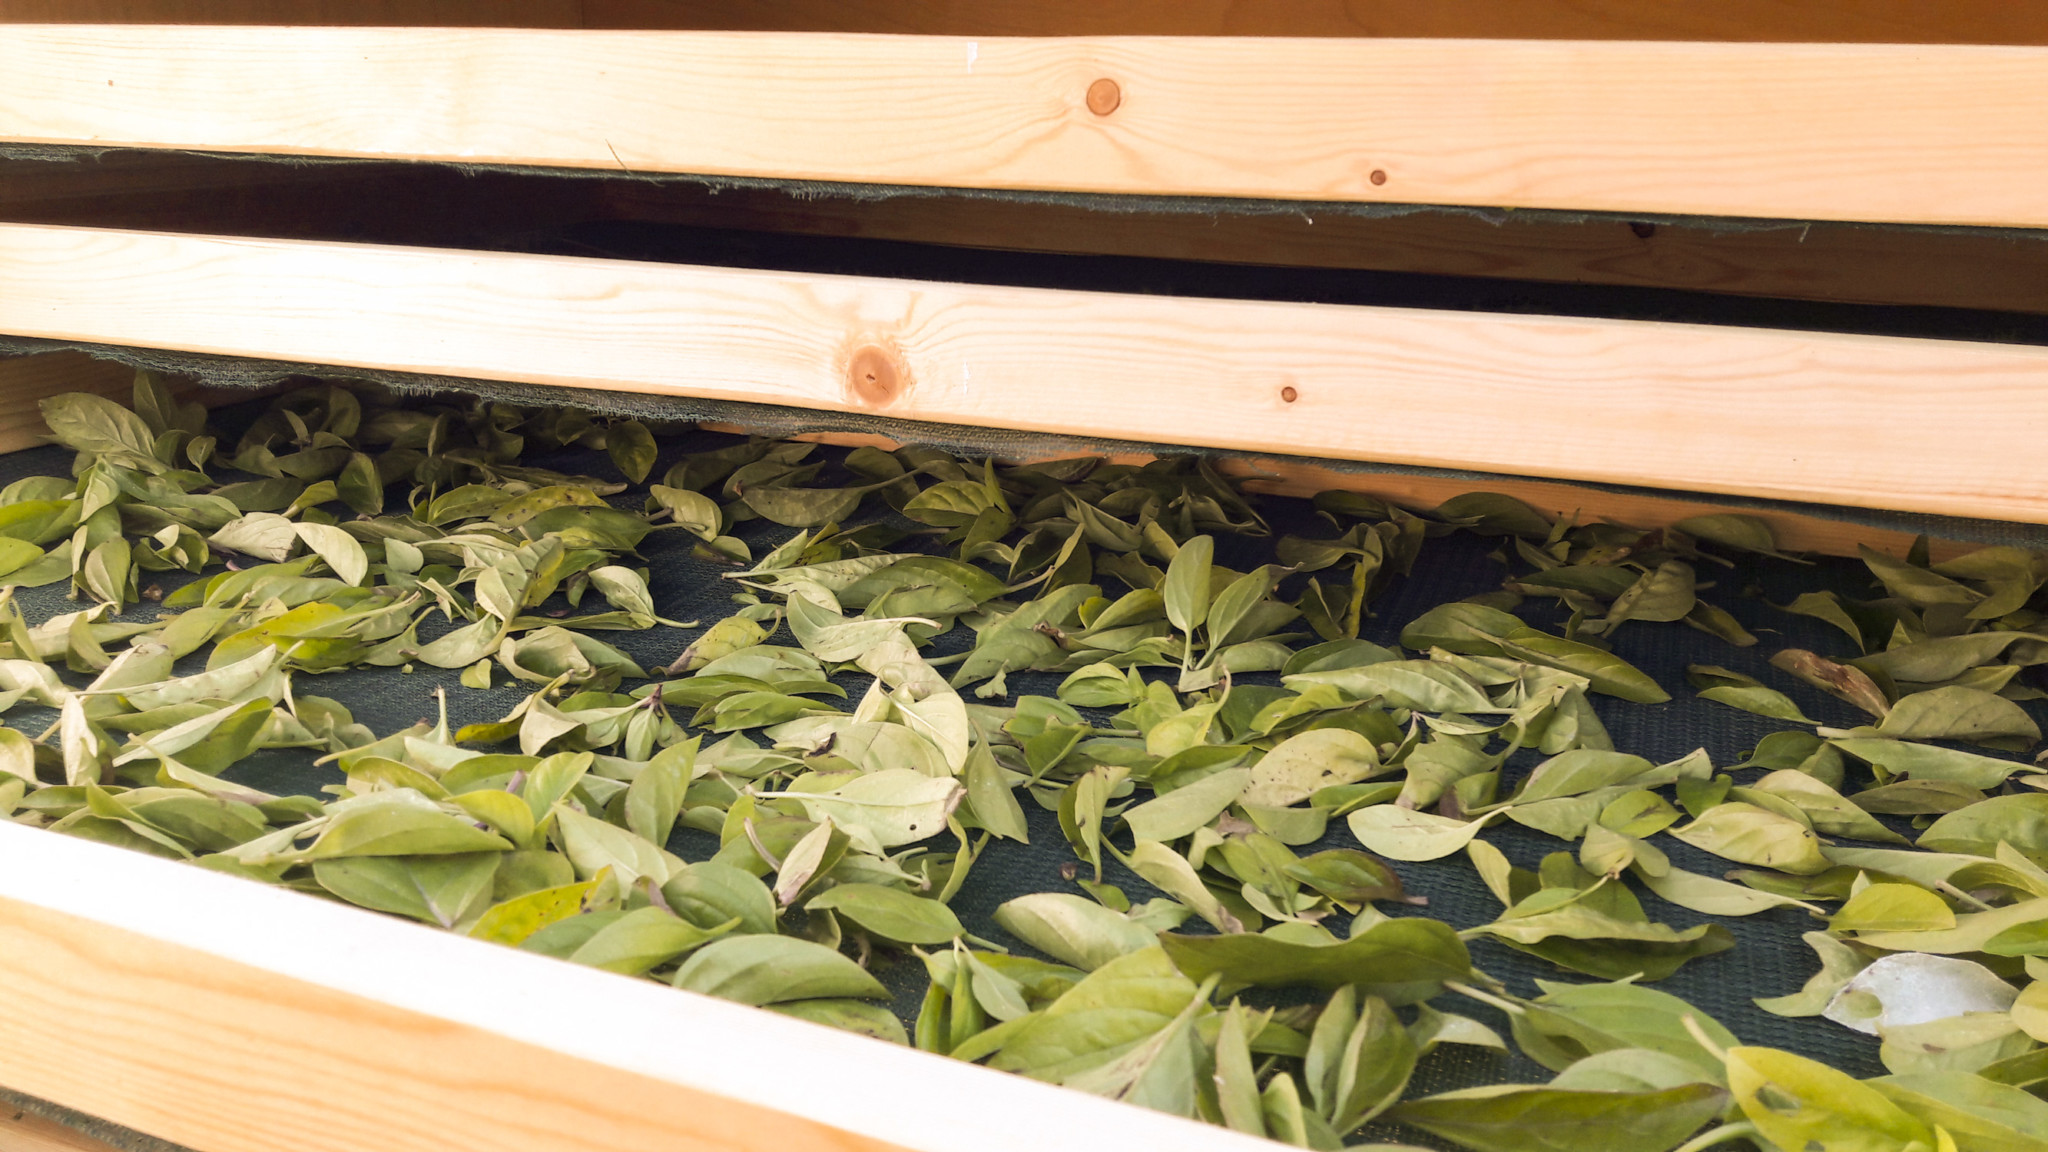
After the frames are ready we oiled them in order to proof them against humidity. Then we cut the wire mesh and the textile mesh and stapled the material on the down side of every frame. We used the different meshes in order to dry different things. The fine mesh is nice for leafed material and the wire mesh for juicy things like tomatoes. Then we placed the tiny latches on both side walls of the box in order to transform the frames into drawers. Afterwards there came the doors and the roof.


Lets start drying
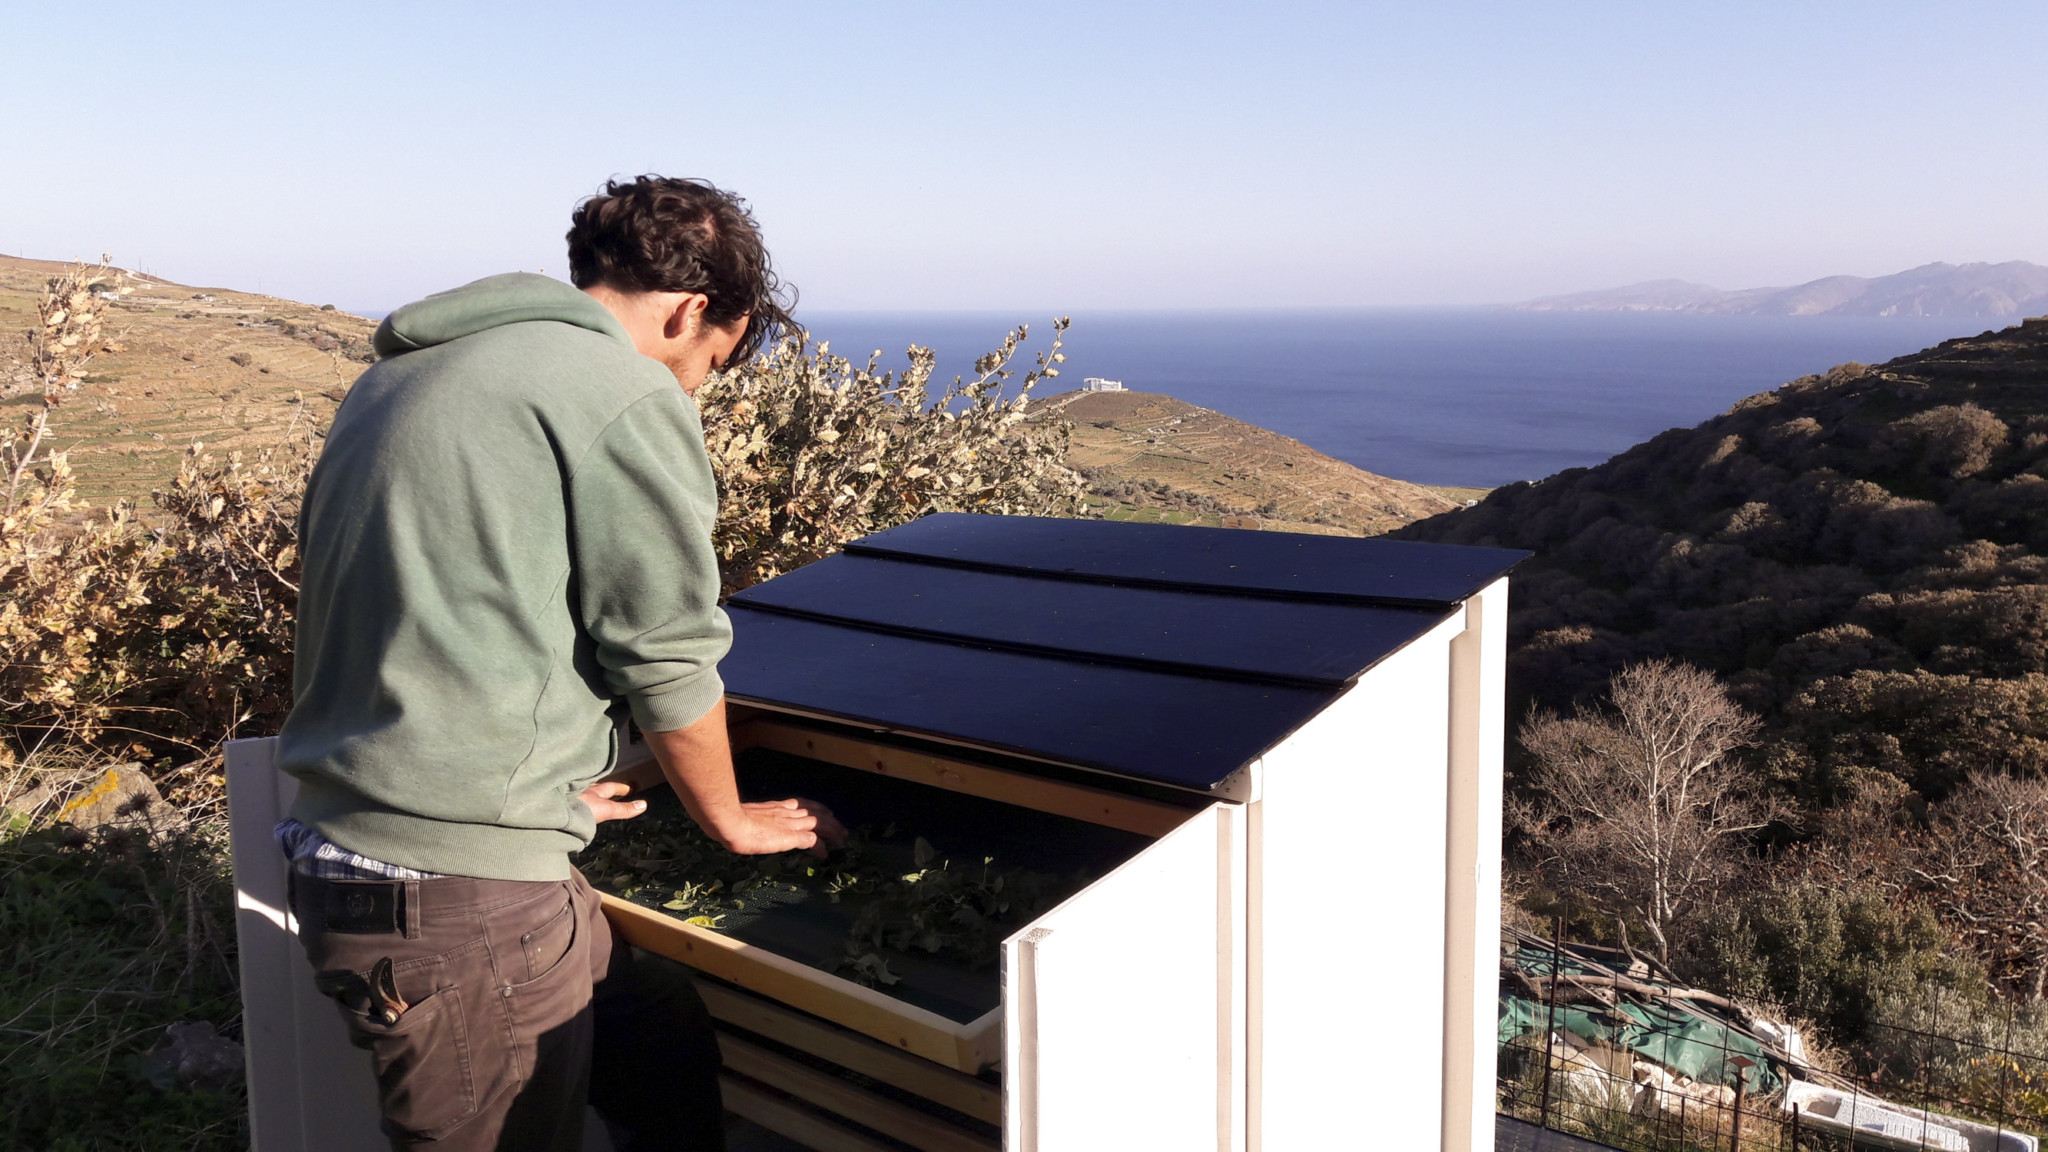
We had some first experiments with the dryer. We tried out basel, nettle and wild mint…..while we have still fairly high temperatures for December (around 15 C) it is some how winter but beside that the temperature are rising to 40 C for at least some ours of the day inside the Box. The nettle leafs took about three days to completely dry out. I believe that is also due to very high humidity levels at this time of the year. We will make some long term temperature measurement with an Arduino datalogger and 4 Temperature Sensors inside the box upper and lower part, in the heater panel and the ambient temperature. So we will make an update to the article in the next weeks……

Improvements
From the initial design to the final build we made some changes that came to us while building(described further down). Also I came across a nice study from Dennis Scanlin that was published in 1999 while writing this article (Study). While reading it I saw that the design described here could surely be improved further. One thing would be to place the copper heat absorber in a diagonal way instead of flat us we did. Also a way to control the size of the air inlet and outlet seams to be a must have. This will help to fine-tune temperature and airflow in order to achieve maximum drying. The other important part is, by closing the air vents, to avoid a reverse thermosiphoning in night time that will suck cold air through the unit resulting in rehydration of the material.

Download for Printing ( PDF)
Credits:
Text : Marilia Kalouli and Nicolas Bedau
Illustration : Nicolas Bedau
Resources:
a lot of inspiration for our system came from:
https://www.motherearthnews.com/diy/tools/solar-food-dehydrator-plans-zm0z14jjzmar
for further reading take a look at the study that has very detailed information on the thermal design:
http://www.rivendellvillage.org/Solar_Food_Dryer.pdf
If you have any suggestions, questions or improvements just post a comment below


Comments
Peter Elmore ,
Love this design, and thinking of building something similar on our farm! I have two questions for you all before we jump in here. First, how much fresh harvested plant volume does this hold for you all? Second, about what was the total cost and build time for this project? Thank you for sharing and for your guidance to the Permaculture community.
Tinos Eco Lodge ,
Hi Peter,
i think the building cost was around 100,-euro, for the timber, the mesh, the paint and the small stuff like screw etc. The collector came from the trash. It took around 3 days to build it, the drawers are quite time intensive. Volume wise, its hard to answer because it depends what you want to dry and on the final quality. If you put apples for example its the surface area of the 8 drawers, if you put nettle leafs it is more because you can stack them a bit. I would say for home use the volume is more then sufficient.
If you want to make a bigger build you should increase the collector size.
If it is any help to you i can provide you the 3d model so you can make adjustments?
greetings nik
Tarek ,
Hi Peter,
Really thanks for sharing, i would like to know if really will be an effect or a diffrence if the air flow started from below to top (in your desgin it shows from top to bottom) which i have seen in some other designs.
Thanks in advance
Tinos Eco Lodge ,
Hi Tarek,
the air flow is from bottom to top in these design. The natural flow of warm air creates the updraft.