Yoga deck construction DIY

In 2016 the Ecolodge expanded its outdoor infrastructure by building the garden kitchen and oven, outdoor showers, compost toilets. In the beginning of 2017 we started conceptualizing a wooden platform that could be used for all kind of activities like yoga seminars, dancing seminars, acrobatics, theatre and so on. Our first design steps where made at the computer visualizing the overall look and the technical necessity that the construction would demand. The goal was to provide a shaded place on the wooden surface for about 15 people with mats. We calculated that we would need an area of about 10,5x4m what comes out to 42 sqm so that every body would have a surface area of 2,8 sqm for moving and laying. We came up with this rectangular area because our stone terraces have very limited depth. The benefit of this shape on the other hand is that it is easy to design the shading pergola without posts that stand in the middle, while maintaining a light weight construction. The pergolas that we have build so far are all covered with bamboo which is a great material for the job. It provides nice playful shade while being a natural material with good look and durability of around 10 years. The downside is that its quite expensive and it comes a long way from Asia. So we also investigated plastic liners, jute linen and plastic textile nets for olive harvest. The last one is very cheap but comes with low durability. The jute linen is also cheap but will start to mould in the very wet conditions of the winter time. The plastic liners are expensive but will last for years, the drawback is that it gets really hot under them in summer.
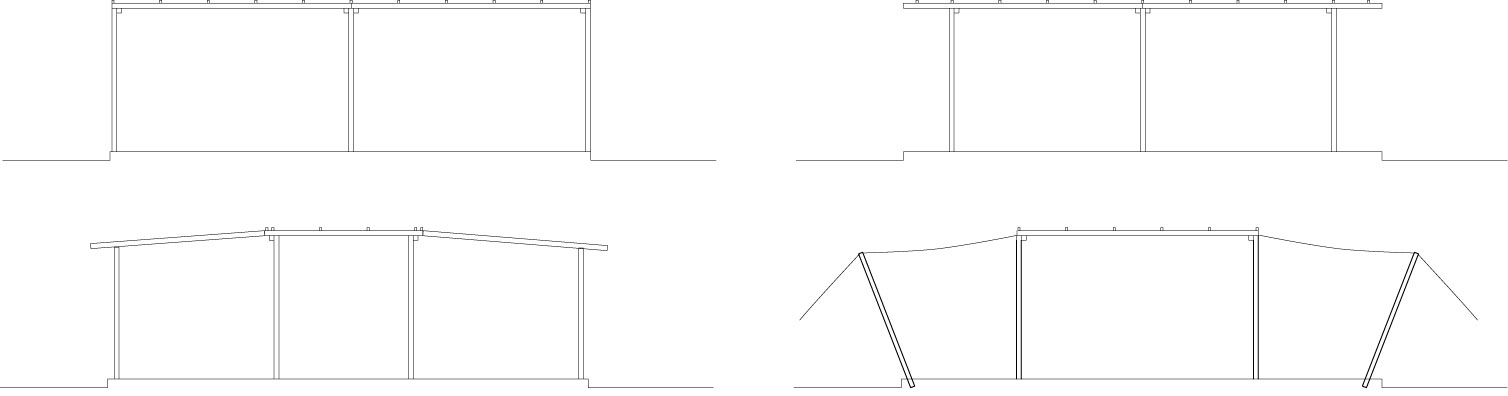
The construction becomes much more complicated when the shading material is flexible, but gives a lot of possibilities for shaping. In the end we decided again for the bamboo but went with a mixed design from bamboo and our local reed that we can locally harvest. On the right are some design alterations for the pergola that we went through depending on the cover material.
Material of the Yoga deck
The type of wood that is used comes down to the most important decision that one has to take while planning an outdoor wooden deck. There are many considerations that could be discussed from an aesthetical point of view such as texture, colour, smell and surface structure. But I believe that this consideration should stand down for Eco friendly, durability and workability.
The durability is decently easy to define while taking a look into the norm EN 350:2016 that describes the resistance of wood to weathering and ground contact.

Timber Durability Chart by Gate Expectations by Inwood
Most of the very resistance hardwoods originate from Africa, South America and Asia. Besides the long transport it is mostly questionable under what circumstances this materials are harvested and how sustainable it is to use them over here in Europe. The FSC label could offer some indication but the certificate has many problems ( further reading at FSC Watch). So in my opinion it is good to go with locally sourced timber that has short transport and local standards. For the Greek market and especially Tinos Island the availability is also an important factor. So that leaves us in the lower price range with European pine that is a soft wood that can be treated well by high pressure impregnation or thermal modification and achieves this way good durability standards. There are two qualities with knots and without knots. The without knots is a bit more pricey but has less splints and no issues with turning loose knots over time. The workability is also great because soft woods are much friendlier to your hand tools than hardwoods. Cedar could be another good choice but has nearly double the cost. The price per sqm starts at around 15 euro for impregnated pine, goes to 25 euro pine knot-less, over 35 euro for keruing, cedar 40 euro and teak around 60 euro. So we went with impregnated knot-less pine that we painted with an outdoor deck oil in the colour teak. For the preservation it is good as a general rule to paint darker colours because they have stronger UV filter capabilities and protect the timber better.

Basic technical design of the yoga deck
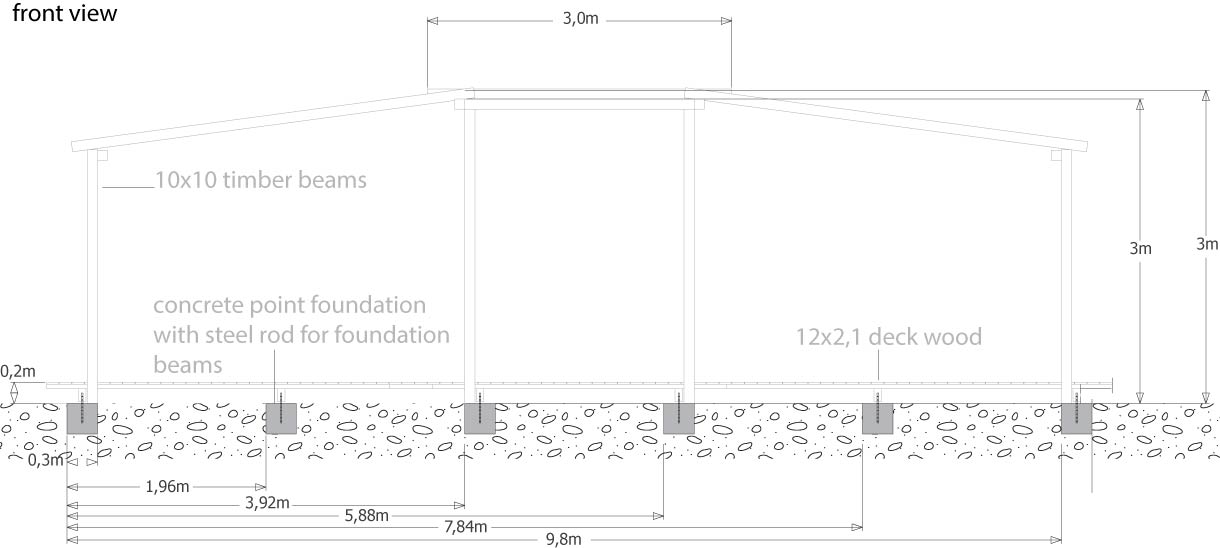
The foundation is made out of 18 point foundations that hold the under construction above the ground level. In order to have a good ventilation below the deck for drying after rain there should be around 15 cm of free space. The 12 point foundations are 30x30x30 cm casted concrete blocks. The other 8 are 30x60x30 because they have to support the extra weight of the Pergola beams. The foundation beams are 15×6 cm and hold the 5x5cm beams that build the support construction.
Beginning of the construction
Here is a small step by step photo series that shows the construction of the clearing and levelling the ground, framing for the foundation, building the deck, erecting the pergolas and some flowers for the end…


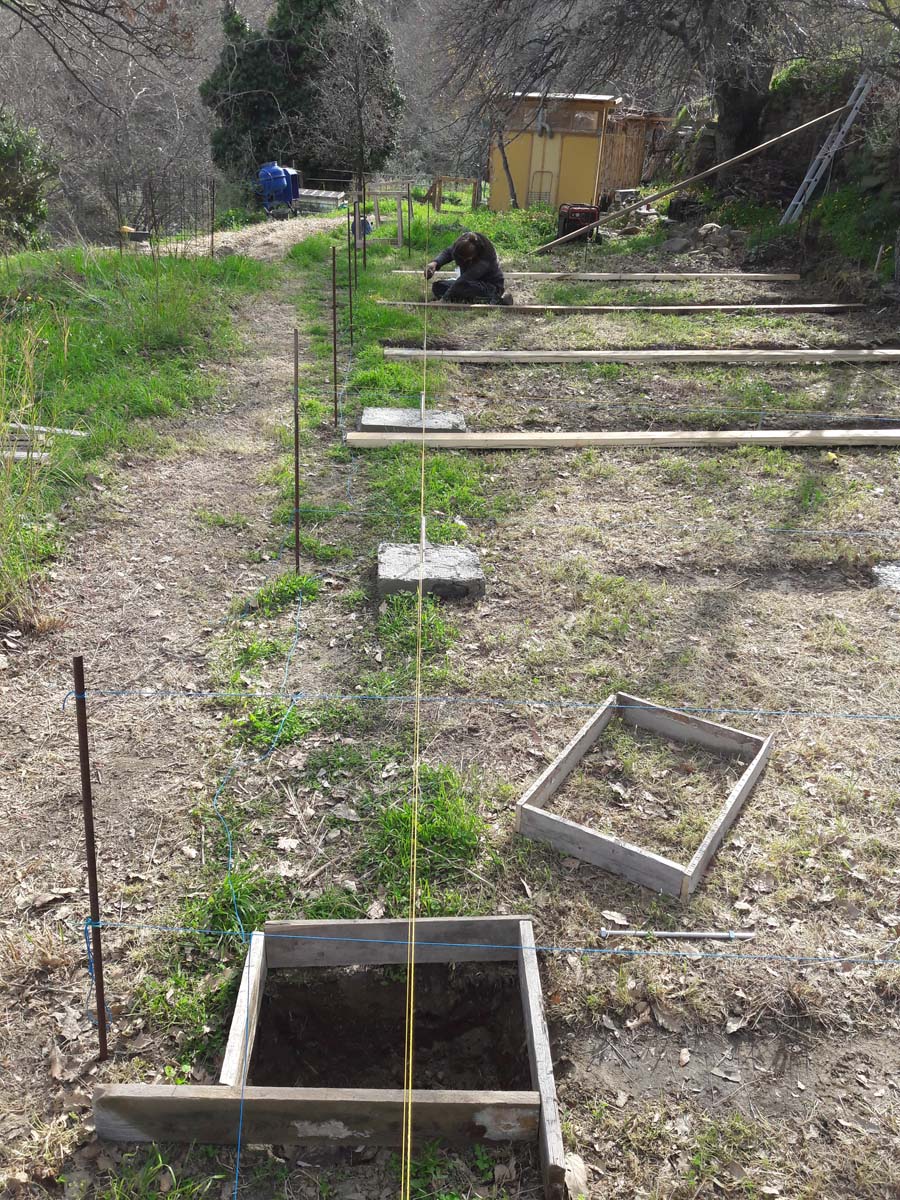
We started by clearing the ground area. Then we built up a basic butter board in order to get our dimensions and levels straight from the beginning. It takes quite some time to set it up but it is a great help throughout the entire building process. Then we went on by digging out the point foundation holes and levelling the ground. This part is the hardest because you have to dig quite a lot and it means moving a lot of earth by hand. After that we built the concrete shutters out of some scrap wood that we had laying around and started to fill them up with on-site mixed concrete. We use and 1:3 ratio from cement and sand/gravel mixture in order to get constructional concrete. In the pouring process we added the galvanized steel rods for the foundation beams. The beams where cut, drilled and installed.


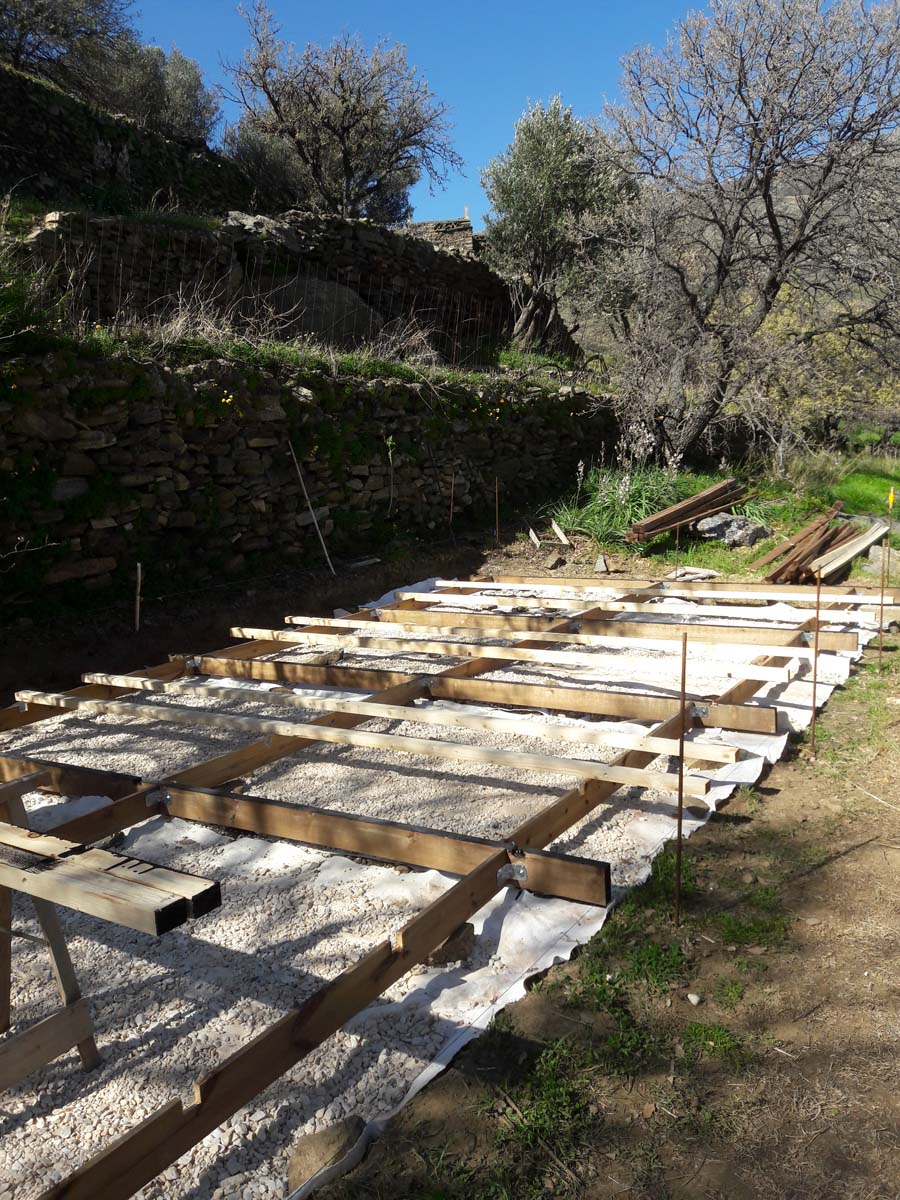

In order to save us some digging we only created ditches along the foundation beams. Then the deck under construction was attached to the foundation beams. Marilia was painting the anti fungicide and the tar on the beams. Then we covered the ground with geotextile in order to have some weed barrier underneath the deck.


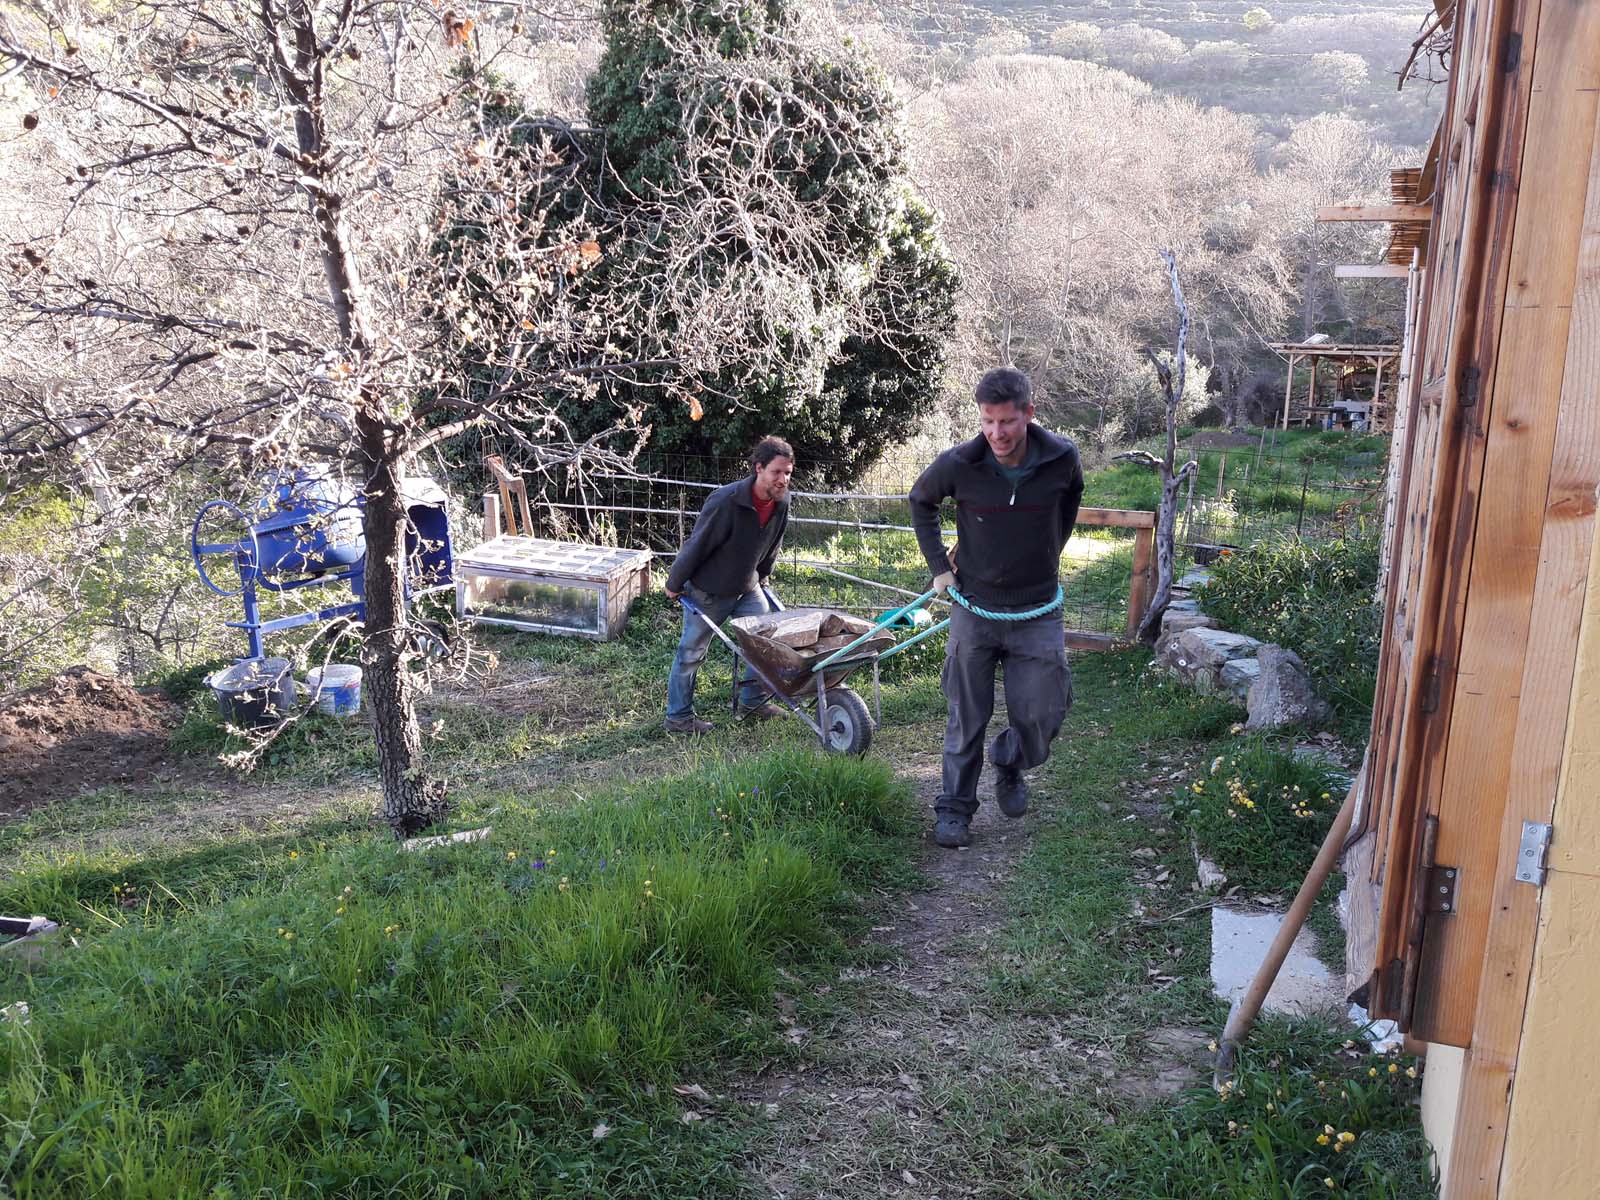

Behind the Deck we decided to build a retention wall in order to hold back the earth that would fall otherwise slowly underneath the deck. So there was another tough job bringing up the stones. But we found that a two donkey driven wheel-borough is quite effective. After getting it done we started screwing the deck on the underconstruction and painting everything with teak oil.


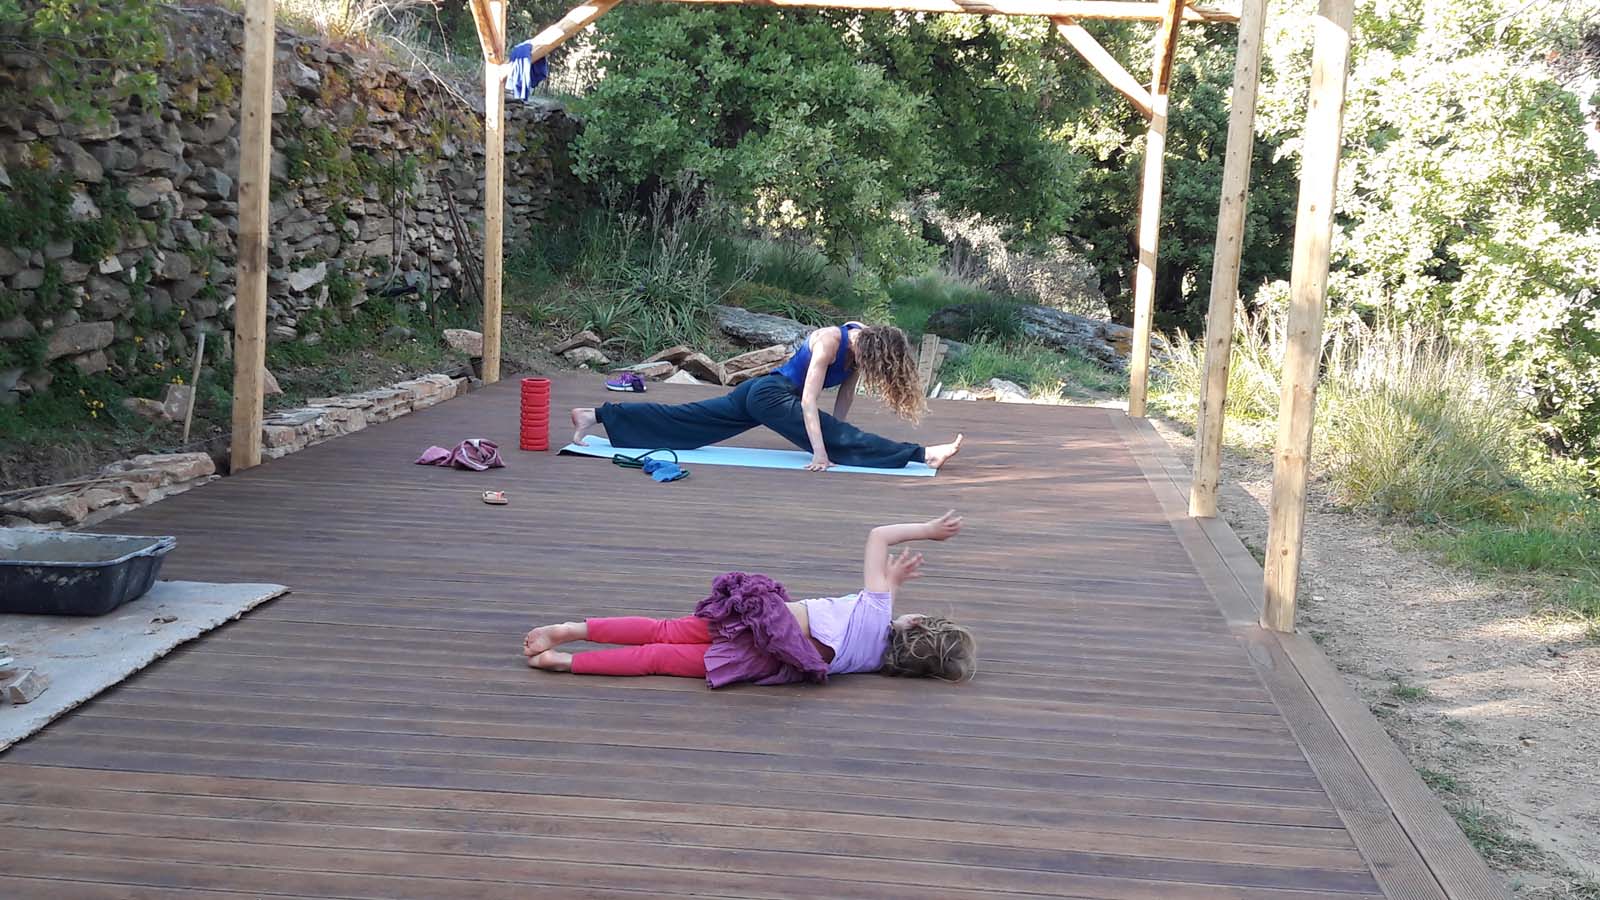
The pergola was nearly finished when we got the first enthusiastic users on the deck. That came with some unknown talents in building with stone. Kids have this amazing ability to find everything new if presented well fascinating. So with some extra hands things are speeding up.


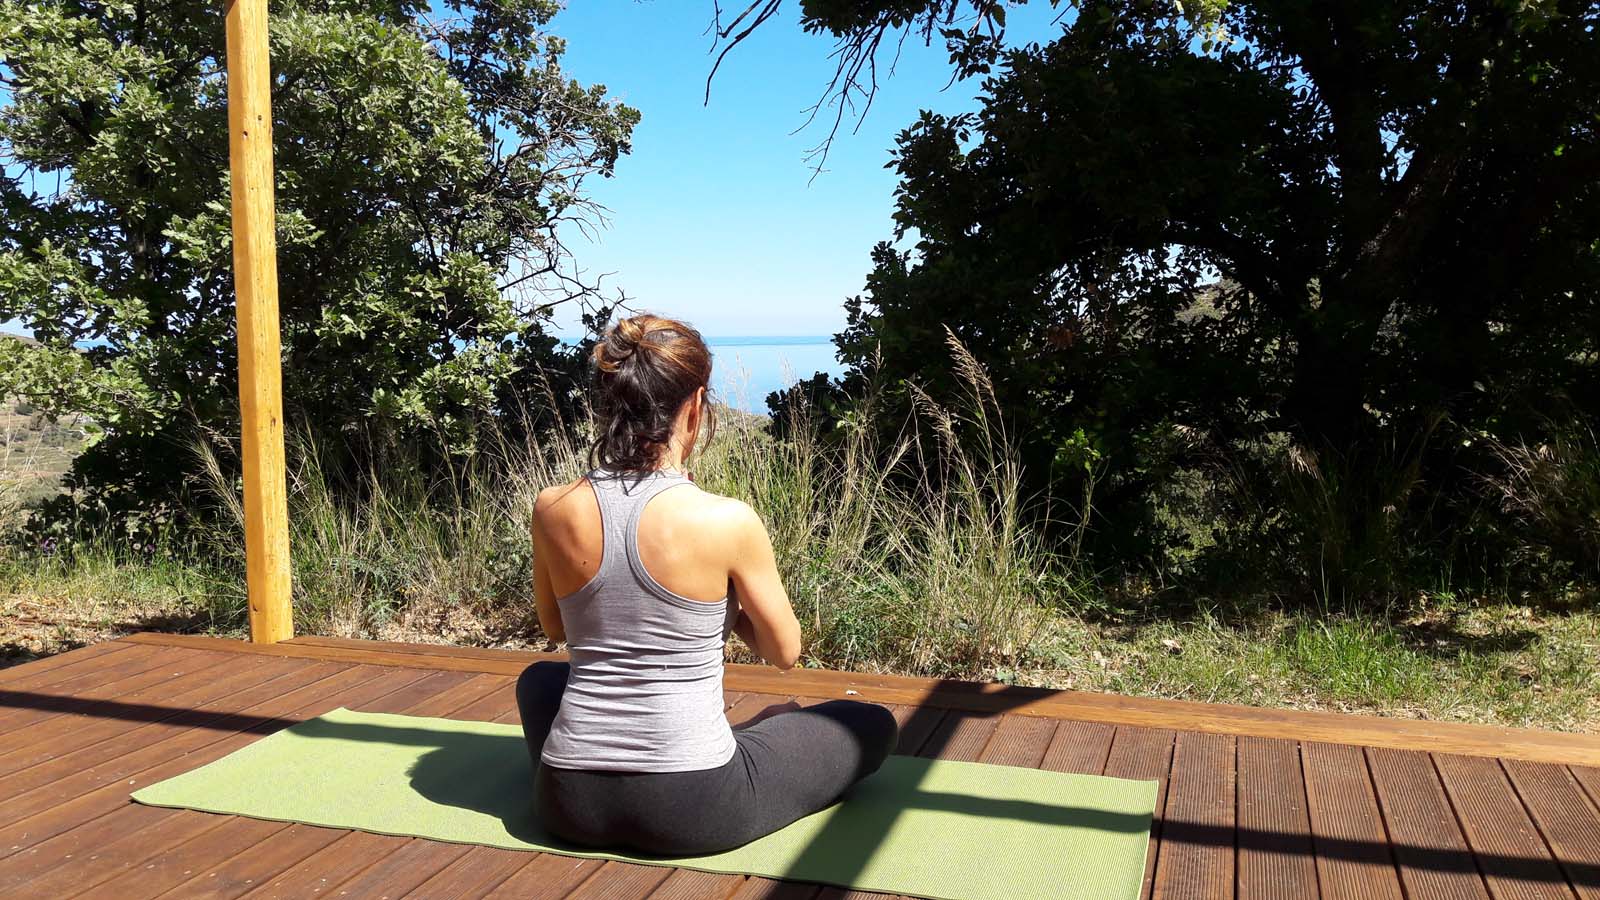

After that we decided to rest a bit and let the construction settle making our first Yoga exercises in the glory of the morning sun and enjoying the hammock on our new spot in the plot.


The finishing up was done with some great help of our friends. Decking the pergola with bamboo on the sides and in the middle we harvested some reeds cleaned them and screwed everything nice and tidy into place. We planted some Bougainvillea that will climb up the pergola in the next years and will paint the whole deck in their amazing blossoming red to rose.
For questions, suggestions and so on don’t hesitate…………
Credits:
Text : Nicolas Bedau
Illustration : Nicolas Bedau
If you have any suggestions, questions or improvements just post a comment below

Hinterlasse einen Kommentar